Kitchen Shelf Organization Ideas on Budget : The kitchen shelf. It seems so simple—a flat surface for storing food, dishes, and the various implements of cooking. Yet without thoughtful organization, shelves become chaotic jumbles where items get lost, forgotten, and wasted. Cans accumulate at the back. Boxes topple over. The shelf that should serve you becomes a source of frustration.
Professional organization products can solve these problems, but they come with professional price tags. Custom shelving, designer bins, and specialty organizers can quickly add up to hundreds of dollars—money that many of us simply don’t have to spare. But effective shelf organization does not require expensive products. With creativity, resourcefulness, and a little DIY spirit, you can achieve remarkable results for very little money.
The ideas that follow are designed for real budgets. They repurpose items you may already have. They use inexpensive materials from dollar stores and discount retailers. They employ simple DIY techniques that anyone can master. From tension rods that cost a few dollars to repurposed containers that cost nothing, these budget-friendly solutions will transform your shelves without breaking the bank.
Read More : How to Declutter Your Kitchen Fast
Vertical Storage Ideas for Small Kitchen Spaces
Simple Pantry Organization Tips for Families
1. The Free Foundation: Declutter and Purge
Before spending a single penny on organization products, you must address the foundation of all organization: having less stuff. The most expensive organizing product in the world cannot fix a shelf that’s simply too full .
Start by removing everything from your shelves. Yes, everything. This creates temporary chaos, but it’s necessary. You need to see the full scope of what you have .
Now evaluate each item with brutal honesty. Check expiration dates on food items—anything past its prime goes in the trash. Consider whether you’ll actually use that specialty ingredient you bought for one recipe years ago. Be honest about duplicates—how many bags of rice do you really need ?
For items that are still good but that you won’t use, consider donating to a food bank or giving to friends. This not only clears your shelves but also benefits others .
As you evaluate, group similar items together. All canned vegetables in one pile, all pasta in another, all baking supplies together. This preliminary grouping will make the next steps easier and reveals the true extent of what you have .
The purge costs nothing but your time, yet it’s the most important step. A shelf with fewer items is inherently more organized than a shelf crammed full. Start here .
2. Repurposed Containers: Free Storage Solutions
Before buying new containers, look around your home for items that can be repurposed for shelf organization. You likely already own many things that can serve this purpose .
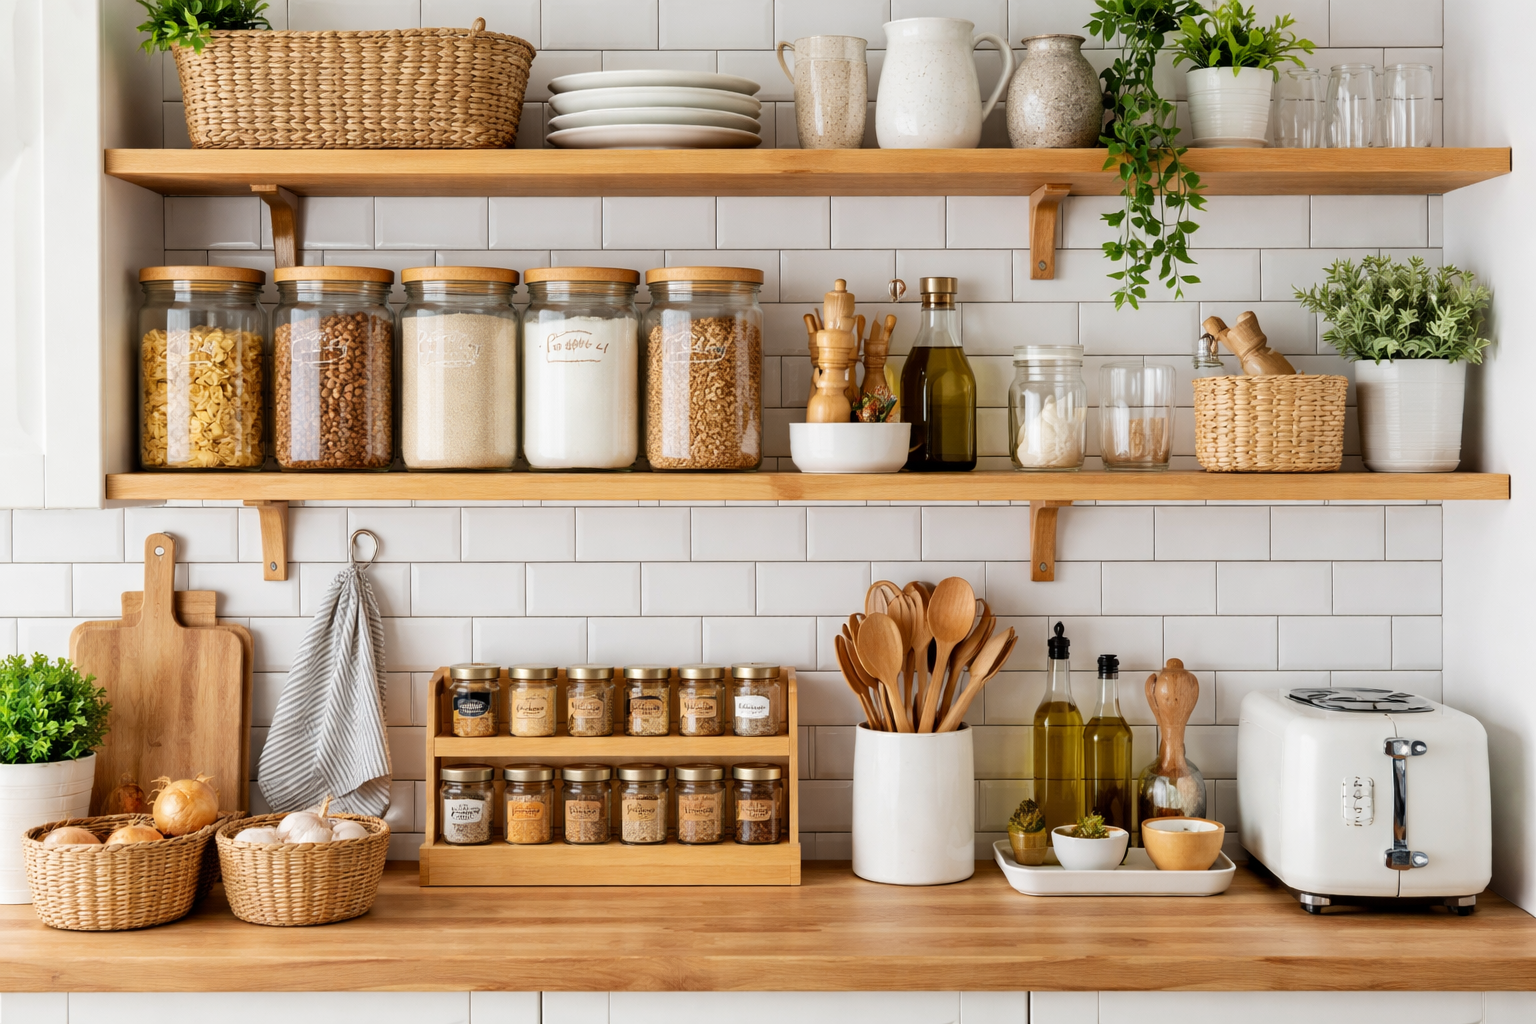
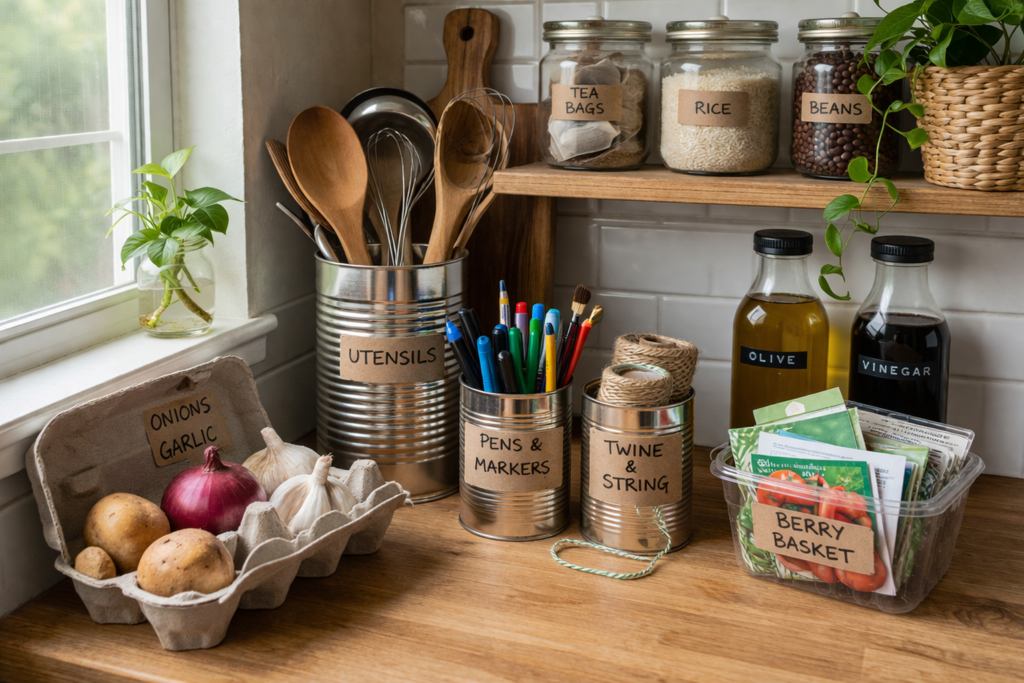
Clean, empty food jars make excellent storage for small items. Pasta sauce jars, pickle jars, and jam jars can hold dried beans, rice, lentils, or spices. Remove labels by soaking in warm, soapy water, and you have free, uniform containers. Paint the lids or add chalkboard labels for a cohesive look .
Shoe boxes, covered with wrapping paper or contact paper, become attractive bins for grouping similar items. Use them to corral snack packages, tea bags, or baking supplies. Label the ends so you can identify contents at a glance .
Cereal containers, once emptied of their original contents, can store pasta, rice, or flour. Their pour spouts make dispensing easy, and they’re often more durable than you’d expect .
Takeout containers, thoroughly cleaned, can organize small items within shelves. Use them for spice packets, bouillon cubes, or yeast packets. The clear plastic lets you see contents .
Baskets you already own—perhaps from other rooms—can be pressed into kitchen service. A basket that held mail might now hold onions or potatoes. Look at your belongings with fresh eyes .
3. Dollar Store Finds: Maximum Value, Minimum Cost
Dollar stores and discount retailers are treasure troves of budget organization products. For very little money, you can find solutions that rival expensive specialty items .
Baskets and bins in various sizes are dollar store staples. Choose uniform colors for a cohesive look—all black, all white, all natural wicker. Use them to group similar items: all canned goods in one, all baking supplies in another .
Tension rods, available at dollar stores, create instant dividers. Place them vertically between shelves to keep baking sheets and cutting boards upright. Place them horizontally to create barriers that prevent items from sliding .
Adhesive hooks can be mounted on the inside of cabinet doors or on shelf edges to hang lightweight items. Use them for measuring cups, kitchen towels, or small utensils .
Small containers—like those meant for office supplies—can organize spice packets, tea bags, or small tools within larger bins. Their small size creates compartments within shelves .
Clear plastic containers, often available in multi-packs, provide uniform storage for dry goods. While not as durable as glass, they’re perfectly functional and cost a fraction of the price .
4. DIY Shelf Risers: Creating Levels
Shelf risers create two levels of storage within a single shelf, effectively doubling your capacity. While commercial risers can be expensive, DIY versions cost very little .
Simple risers can be made from small cans or jars. Place a small, sturdy can at each corner of a flat surface—a piece of cardboard covered with contact paper, a small cutting board, or even a sturdy book—and you have an instant riser .
For a more permanent solution, build risers from wood. A simple board with small blocks attached at each corner creates a sturdy riser. Paint or stain to match your shelves, and you have custom organization for pennies .
Even sturdy cereal boxes, cut to size and covered with contact paper, can serve as temporary risers. They won’t hold heavy weight but work well for lightweight items like spice jars .
The key to effective risers is stability. Ensure whatever you use won’t tip or slide. Non-shelf liner between layers adds grip .
5. Tension Rod Magic: Low-Cost Dividers
Tension rods are among the most versatile and inexpensive organization tools available. A few dollars buys a rod that can serve multiple purposes .
Use tension rods vertically to create dividers for baking sheets, cutting boards, and trays. Place a rod at each end of the shelf, and slide your sheets between them. This keeps everything upright and accessible, preventing the chaotic slide that happens when these items are stacked .
Use tension rods horizontally to create barriers that prevent items from sliding off shelves. Place a rod at the front of a shelf to keep cans and jars from falling forward when you open the door .
Use tension rods to create compartments within deep shelves. Place multiple rods vertically to create sections for different categories—canned vegetables in one section, canned beans in another .
Use tension rods to hang lightweight items. Place a rod under a shelf and hang measuring cups or small utensils from S-hooks. This utilizes space that would otherwise be empty .
6. Cardboard Dividers: Free and Customizable
Cardboard is free, readily available, and surprisingly useful for shelf organization. With a little creativity, it can create custom compartments that perfectly fit your space .
Cut cardboard strips to create dividers within boxes or bins. Measure the interior of a bin, cut strips to fit, and create a grid that keeps small items separated. This is perfect for organizing spice packets, tea bags, or small tools .
Create vertical dividers for shelves by cutting cardboard to the shelf height and width. Insert them vertically to create compartments for baking sheets, cutting boards, or trays. Multiple dividers create multiple compartments .
For a more finished look, cover cardboard with contact paper or leftover wrapping paper. This adds durability and makes the dividers more attractive. Choose patterns that complement your kitchen .
Cardboard won’t last forever, but it costs nothing and can be easily replaced. For temporary or experimental organization, it’s ideal .
7. Labeling on a Budget: Free and Low-Cost Options
Labels are essential for maintaining organization, but professional label makers cost money. Budget-friendly labeling options abound .
Chalkboard labels are inexpensive and reusable. Write with chalk or chalk marker, wipe clean when contents change. A roll of chalkboard contact paper can be cut to any size .
Masking tape and permanent marker is the ultimate budget labeling solution. It’s not beautiful, but it’s functional and costs pennies. For a cleaner look, use painter’s tape, which removes cleanly .
Write directly on containers with permanent marker. This works on glass, plastic, and metal. To remove, use rubbing alcohol or nail polish remover .
For a more attractive option, use address labels from office supply stores. Write neatly with permanent marker and stick to containers. They’re inexpensive and come in various sizes .
Cut tags from cardstock and attach with string or rubber bands. This works well for baskets and bins where adhesive labels might not stick .
8. Baskets You Already Own
Before buying new baskets, look at what you already have. Baskets from other rooms can be repurposed for kitchen organization .
Decorative baskets that held mail or magazines can hold onions, potatoes, or garlic on open shelves. Their open construction allows air circulation, keeping produce fresh .
Small baskets that held bathroom supplies can organize spice packets or tea bags within cabinets. Their small size creates compartments within larger spaces .
Laundry baskets, if clean and appropriately sized, can hold bulk items on lower shelves. Use them for paper towels, bulk grains, or large packages .
Woven baskets add warmth and texture to open shelving. If you have them elsewhere in your home, consider whether they might serve better in the kitchen .
9. Repurposed Kitchen Items
Look within your kitchen for items that can serve new organizational purposes. You likely already own many things that can be pressed into service .
Muffin tins make excellent organizers for small items within drawers or on shelves. Use them to hold spice packets, tea bags, or small tools. The individual cups prevent items from mixing .
Ice cube trays can organize even smaller items—earrings in a drawer, perhaps, or in the kitchen for very small parts like screwdrivers for appliance repair .
Pie plates can corral small items on shelves. Their low sides make items visible while keeping them contained. Use them for packets, small jars, or frequently used items .
Bundt pans, with their distinctive hole, can hold kitchen towels or utensil—drape towels through the hole for a fun, functional display .
Cookie sheets can serve as portable shelves. Place one on a shelf to create a slide-out surface—pull the whole sheet forward to access items at the back .
10. Creative Use of Vertical Space
Vertical space within shelves is often wasted. Budget-friendly solutions can put this space to work .
Stackable items naturally create vertical storage. Cans can be stacked, though be careful with stability. Small appliances can stack when not in use—a blender with its pitcher stored upside down on the base saves space .
Use the sides of shelves for hanging lightweight items. Adhesive hooks on the underside of a shelf can hold measuring cups or small utensils. This utilizes space that would otherwise be empty .
Consider hanging items from the shelf above using S-hooks. Lightweight baskets or containers can hang below a shelf, creating an extra layer of storage .
For open shelving, consider the vertical space between shelves. Tall items can go on lower shelves with adequate clearance; shorter items can go above .
11. Grouping Strategies: Free Organization
How you arrange items on shelves costs nothing but dramatically affects organization. Thoughtful grouping makes finding things intuitive .
Group similar items together. All canned vegetables in one area, all canned beans in another. All pasta together, all rice together. This makes inventory quick and shopping lists accurate .
Within groups, consider frequency of use. Frequently used items at the front, occasional items behind. This applies to every category—baking supplies, snacks, canned goods .
Consider the “first in, first out” principle. When adding new items, place them behind existing ones. This ensures older items get used before they expire .
For deep shelves, create front-to-back organization. Use bins or baskets to create “drawers” that can be pulled forward. This prevents items at the back from being forgotten .
12. Maintenance Systems That Cost Nothing
The best organization in the world is useless without maintenance. But maintenance systems cost nothing but time and attention .
The daily reset is free. Each time you use the pantry, take a moment to return items to their proper places. That box of pasta that ended up on the wrong shelf? Put it back. This daily attention prevents gradual drift .
The weekly check costs nothing. Once a week, open your pantry and assess. Is everything in its place? Are there any areas that need attention? This weekly check catches problems before they become overwhelming .
The monthly inventory is free. Once a month, check expiration dates and note what’s running low. This prevents waste and ensures you’re never caught without essentials .
The seasonal reset costs only time. Every few months, do a quick refresh. Pull everything out, wipe shelves, and reassess. Are your categories still working? Do you need to adjust anything ?
| Budget Solution | Cost | What It Does | Where to Find It |
|---|---|---|---|
| Declutter and Purge | Free | Reduces what needs organizing | Your own pantry |
| Repurposed Containers | Free | Provides storage containers | Your own home |
| Dollar Store Finds | $1-$5 each | Baskets, bins, tension rods | Dollar stores |
| DIY Shelf Risers | Free-$5 | Creates two-level storage | Repurposed items + contact paper |
| Tension Rods | $2-$5 | Dividers, barriers, hangers | Dollar stores, discount retailers |
| Cardboard Dividers | Free | Custom compartments | Shipping boxes, packaging |
| Budget Labeling | Free-$3 | Identifies contents | Masking tape, chalkboard contact paper |
| Repurposed Baskets | Free | Grouping and corralling | Other rooms in your home |
| Repurposed Kitchen Items | Free | Creative organization | Your own kitchen |
| Vertical Space Solutions | Free-$5 | Uses often-wasted space | Adhesive hooks, S-hooks |
| Grouping Strategies | Free | Logical arrangement | Your own planning |
| Maintenance Systems | Free | Keeps order over time | Your own habits |
The Philosophy of Budget Organization
Organizing on a budget is not about deprivation—it’s about resourcefulness. It’s about seeing potential in items you already own, finding creative solutions to storage challenges, and investing your time rather than your money .
Budget organization also forces intentionality. When you can’t simply buy a solution, you must think more deeply about the problem. This often leads to better, more customized solutions than any store-bought product could provide .
There’s also satisfaction in DIY organization that store-bought solutions can’t match. Looking at a shelf organized with repurposed containers and homemade dividers, knowing you created order from what you had—that feeling is priceless .
When to Spend, When to Save
While many organization solutions can be DIYed on a budget, some situations warrant spending a little money. Knowing the difference saves frustration .
Spend on items that will see heavy use or need to bear weight. Tension rods, for example, are worth buying new—they need to hold securely. Bins for heavy canned goods should be sturdy enough for the load .
Save on items where appearance matters less. Cardboard dividers inside cabinets, hidden from view, don’t need to be beautiful. Repurposed containers in closed cabinets work fine regardless of appearance .
Spend on items that will last. Quality containers for dry goods, if you can afford them, will serve for years. But start with what you have, and upgrade gradually as budget allows .
Save on experimental solutions. If you’re not sure a system will work, try a free or low-cost version first. If it works, you can invest in something more permanent later .
Conclusion : Kitchen Shelf Organization Ideas on Budget
A well-organized kitchen shelf need not cost a fortune. With creativity, resourcefulness, and a little effort, you can achieve remarkable results for very little money. The ideas presented here—from the free foundation of decluttering to repurposed containers, from dollar store finds to DIY dividers—prove that effective organization is accessible to everyone .
Start with what you have. Purge ruthlessly, then look at your remaining items with fresh eyes. What can be repurposed? What can be rearranged? What problems need solving ?
Then shop your home before shopping the store. Raid other rooms for baskets and containers. Save jars and boxes that might serve. You’ll be surprised how much you already own .
For what you must buy, start with dollar stores and discount retailers. Tension rods, basic bins, and adhesive hooks cost little but solve many problems. Upgrade gradually as budget allows .
Remember that organization is an ongoing process, not a one-time event. The systems you create will need maintenance, and your needs will evolve over time. But the foundation you build with these budget-friendly ideas will serve you for years .
Your kitchen shelves have potential. With these ideas, you can unlock that potential without breaking the bank. Start today, start small, and build from there. Your organized kitchen awaits .