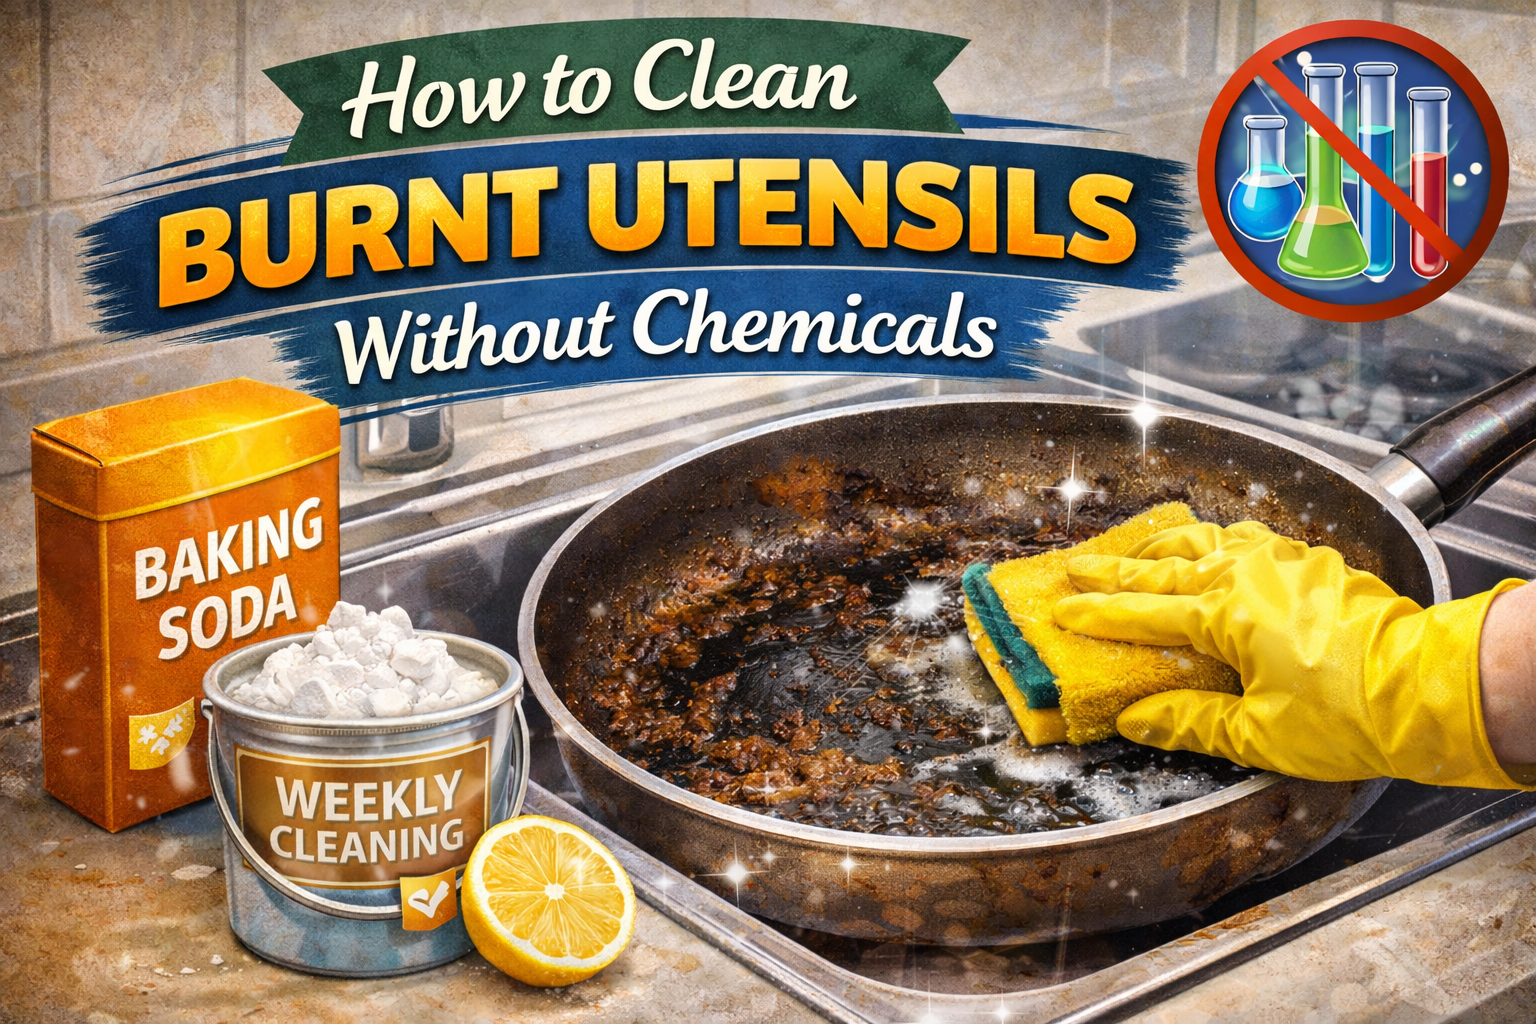
How to Clean Burnt Utensils Without Chemicals : There is a moment every home cook knows well. You turn away for just a second too long, or the phone rings at the worst possible time, and suddenly the comforting sizzle of your simmering sauce transforms into an acrid, alarming smell. You rush to the stove, heart sinking, to find a dark, smoking crust welded to the bottom of your favorite pot or pan. It is a moment of culinary tragedy that often leads to a dreaded, hours-long scrubbing session with harsh, chemical-laden cleaners that leave you lightheaded and your hands raw.
But what if there was a better way? What if you could restore your beloved cookware to its former glory using ingredients that are safe enough to eat, gentle on your hands, and kind to the environment? This comprehensive guide will show you that you can. By harnessing the simple, powerful chemistry of everyday pantry staples, you can conquer even the most stubborn burnt-on messes without a single drop of toxic cleaner. We will explore a variety of methods tailored to different types of cookware and levels of burnt-on disaster, from the gentle soak to the heavy-duty simmer. Prepare to learn the secrets of natural burnt-on food removal and rescue your utensils from the brink.
See More : How to Clean Gas Stove Naturally at Home
Part 1: Understanding the Burn – The Science of a Stuck-On Crust
Before we dive into solutions, it is helpful to understand what we are up against. That blackened, rock-hard layer on the bottom of your pan is not simply “dirt.” It is a complex matrix of polymerized oils and carbonized food particles.
When food, particularly food containing fats and sugars, is heated to a very high temperature, a chemical transformation occurs. The fats undergo a process called polymerization, where individual fat molecules link together to form long, strong chains, creating a plastic-like film. Simultaneously, the carbohydrates and proteins in the food carbonize, turning into elemental carbon—essentially, charcoal. This combination of polymerized oil and carbon creates a bond to the metal of the pan that can be incredibly tenacious.
To break this bond without chemicals, we need to employ one or more of the following physical and chemical principles:
- Rehydration: Water, especially when combined with heat and an alkali like baking soda, can help to penetrate and rehydrate the burnt-on layer, softening it and breaking its bond with the pan.
- Abrasion: Gentle physical scrubbing with a soft abrasive like baking soda or salt can mechanically wear away the softened burnt layer without scratching the underlying surface.
- Acid Cleaning: Acids like vinegar or lemon juice can react with and help dissolve mineral deposits and some types of burnt-on food residues.
- Soaking and Heat: Prolonged soaking in hot water is one of the most effective methods. The heat energy helps to vibrate and loosen the molecular bonds of the burnt-on layer, while the water gradually works its way underneath.
- The Boiling Method: This is a powerful technique that combines heat, water movement (convection), and the chemical action of a cleaning agent to forcefully detach burnt-on food from the pan’s surface.
Part 2: Assembling Your Natural Toolkit
Your arsenal for this battle is already sitting in your kitchen cabinets. Here are the key players and the roles they will play.
- Baking Soda (Sodium Bicarbonate): This is your primary weapon. It is a mild alkali, which helps to saponify fats (turn them into a primitive soap), making them water-soluble. Its fine, crystalline structure makes it a perfect gentle abrasive for scrubbing away loosened residue without scratching most surfaces .
- White Vinegar (Acetic Acid): Vinegar is your acid specialist. It is excellent for dissolving hard water mineral deposits that often form a ring around burnt food. Its acidity also helps to break down certain types of burnt-on starches and can react with baking soda to create a fizzing action that provides mechanical lift .
- Lemon Juice (Citric Acid): Similar to vinegar, lemon juice provides acidic cleaning power with the added benefit of a fresh, pleasant scent and natural bleaching properties that can help brighten lighter-colored cookware .
- Coarse Salt (Kosher or Sea Salt): Salt is your heavy-duty mechanical scrubber. Its larger, harder crystals provide more abrasive power than baking soda, making it ideal for the toughest, most stubborn patches of burnt carbon on durable surfaces like stainless steel or cast iron .
- Dish Soap: A simple, natural liquid dish soap acts as a surfactant, helping water to penetrate and lift grease. It is a supporting player, not a star, in this show .
- Aluminum Foil: A humble ball of crumpled aluminum foil is surprisingly effective as a gentle yet powerful scrubber for certain types of cookware, particularly glass and ceramic .
- Dishwasher Tablet or Powder: While technically a manufactured product, a single dishwasher tablet is far less harsh than a bottle of oven cleaner. It contains powerful enzymes and detergents designed to break down baked-on food and can be a secret weapon for the most hopeless cases .
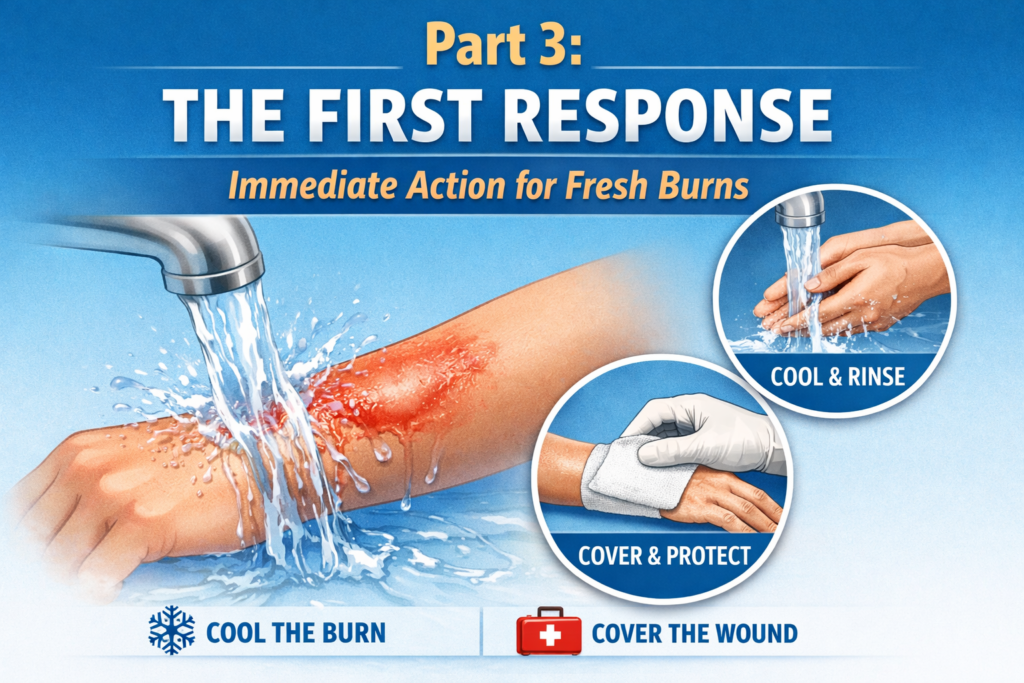
Part 3: The First Response – Immediate Action for Fresh Burns
Time is of the essence. The moment you realize you have a burnt pot, your immediate actions can make the difference between a simple cleanup and a major project.
- Remove from Heat: The very first thing to do is get the pan off the hot burner. This stops the cooking and carbonization process immediately.
- Do Not Add Cold Water: This is the most common mistake. Pouring cold water into a scorching hot pan can cause thermal shock, which can warp the metal or even cause glass or ceramic cookware to crack or shatter. Let the pan cool down on its own or on a cool burner for at least 10-15 minutes .
- Assess and Soak: Once the pan is cool enough to handle safely but still warm, fill it with hot water from the tap. Add a generous squirt of dish soap. Let it soak for at least 30 minutes, or ideally an hour. This simple soak will often loosen a surprising amount of the burnt residue, and much of it will simply float away when you empty the water .
Part 4: Method 1 – The Baking Soda Simmer (The Workhorse)
This is the most effective and versatile method for tackling a wide range of burnt-on messes in stainless steel, enamel, and ceramic cookware. It uses the power of heat and the gentle chemistry of baking soda.
Best for: Stainless steel pots and pans, enameled cast iron, ceramic-coated cookware.
Ingredients:
- Water
- 1/4 to 1/2 cup of baking soda (more for larger, more heavily burnt pots)
- A non-scratch scrubbing sponge or spatula
Step-by-Step Instructions:
- Prepare the Pan: Ensure the burnt pan is cool enough to handle. Do not attempt this on a scorching hot pan.
- Add Water and Baking Soda: Fill the bottom of the burnt pot with enough water to cover the burnt area by about an inch or two. Sprinkle the baking soda generously over the burnt surface and into the water. There is no need to stir; it will dissolve as it heats .
- Bring to a Boil: Place the pot on the stove over medium-high heat and bring the water to a boil.
- Simmer and Scrape: Once boiling, reduce the heat to a gentle simmer. Let it simmer for 10-15 minutes. As it simmers, you can use a wooden spoon or a silicone spatula to gently scrape at the bottom of the pan. You will likely see large flakes of the burnt crust starting to detach and float in the water. This is a good sign .
- The Vinegar Boost (Optional): For an extra-powerful treatment, after simmering with baking soda, carefully pour in about 1/2 cup of white vinegar. It will fizz vigorously. Let it fizz for a minute, then turn off the heat and let the pan sit for another 10-15 minutes . The combination of baking soda’s alkalinity and vinegar’s acidity, along with the fizzing action, can dislodge even the most stubborn residue.
- Cool and Scrub: Let the water cool down completely. Pour out the now-dark, murky water. You will be left with a pan that may still have a thin layer of residue, but the bulk of the burnt crust will be gone.
- Final Scrub: Sprinkle a fresh layer of dry baking soda onto the damp pan. Use a non-scratch sponge or a soft brush to scrub the remaining residue away. The baking soda acts as a gentle abrasive to polish off the last bits. Rinse thoroughly and dry .
Part 5: Method 2 – The Vinegar and Baking Soda Fizz (The Double-Agent)
This method is excellent for pans with a combination of burnt food and hard water stains or mineral buildup. The fizzy reaction provides a mechanical cleaning action that is both effective and satisfying to watch.
Best for: Stainless steel, glass, ceramic, and enamel cookware.
Ingredients:
- White vinegar
- Baking soda
- Water
- A non-scratch sponge
Step-by-Step Instructions:
- The Vinegar Soak: First, pour enough white vinegar into the burnt pan to cover the bottom with a layer about 1/4 to 1/2 inch deep. Let it sit for 5-10 minutes. The acid will start working on any mineral deposits and help to soften the burnt crust .
- Add Baking Soda: Sprinkle a generous amount of baking soda directly into the vinegar. The mixture will immediately erupt in a vigorous, foaming reaction. This is the fizzy magic you are looking for.
- Let It Work: Allow the fizzing mixture to sit in the pan for 15-30 minutes. As the bubbles subside, they help to lift and loosen the burnt-on particles from the surface .
- Add Hot Water: After the fizzing has stopped, fill the pan with hot water and let it soak for another 30 minutes to an hour .
- Scrub and Rinse: Pour out the water and scrub the pan with a non-scratch sponge. Most of the residue should come off easily. For any remaining spots, make a paste of baking soda and water and use it as a gentle scrub. Rinse and dry thoroughly .
Part 6: Method 3 – The Salt Scrub (The Heavy-Duty Abrasion)
When you are dealing with a thick, baked-on carbon crust that has resisted soaking, it is time to bring in the coarse salt. This method relies on physical abrasion rather than chemical reactions.
Best for: Cast iron skillets (unseasoned areas), stainless steel, and oven-safe glass dishes. Use with caution on enamel, as coarse salt can potentially scratch it.
Ingredients:
- Coarse salt (kosher or sea salt works best)
- A halved potato, a soft cloth, or a non-scratch scrub brush
Step-by-Step Instructions:
- Prepare the Pan: Ensure the pan is cool. If there are any large, loose food particles, scrape them off first.
- Add a Little Water: Sprinkle just enough water into the bottom of the pan to make it damp. You don’t want a puddle, just enough moisture to help the salt adhere.
- Apply the Salt: Pour a generous layer of coarse salt onto the damp, burnt areas. The salt crystals should form a thick, gritty paste when mixed with the water.
- Choose Your Scrubber and Scrub:
- The Potato Method: Cut a raw potato in half. Use the cut side as your scrubber. The potato provides a good grip and a surface to press the salt into the burnt crust as you scrub in circular motions. This is a traditional and effective technique .
- The Cloth Method: Fold a thick, damp cloth or use a balled-up piece of burlap. Dip it in the salt paste and scrub vigorously.
- The Brush Method: Use a stiff-bristled, non-metal brush to scrub the salt paste into the burnt areas.
- Rinse and Repeat: As you scrub, you will feel the burnt crust breaking down. Rinse the pan and check your progress. For very thick buildup, you may need to repeat the process a few times, applying fresh salt and water each time .
- Final Wash: Once the burnt food is removed, wash the pan thoroughly with warm, soapy water to remove all salt residue, then dry completely.
Part 7: Method 4 – The Dishwasher Tablet Wonder (The Secret Weapon)
This method may seem almost too good to be true, but it is remarkably effective for the most severe cases of burnt-on disaster. A single dishwasher tablet contains a concentrated blend of enzymes, detergents, and degreasers designed to tackle baked-on food in a machine. When used directly in a pot, it becomes a super-powered cleaning agent.
Best for: Stainless steel and enamel cookware. Do not use this method on aluminum, as the detergents can discolor or damage it.
Ingredients:
- 1 dishwasher tablet or pod (any brand)
- Water
- A non-scratch sponge
Step-by-Step Instructions:
- Prepare the Pan: Place the burnt pot on the stove.
- Add Water and the Tablet: Fill the pot with enough water to cover the burnt area. Drop in one dishwasher tablet. Do not use the tablet wrapper; just the tablet itself .
- Bring to a Boil: Bring the water to a boil over medium-high heat. As the water heats, the tablet will dissolve and begin to work.
- Simmer: Once boiling, reduce the heat and let it simmer gently for 10-15 minutes. You will likely see the burnt crust starting to lift and float to the surface.
- Cool and Empty: Turn off the heat and let the water cool completely. The cooling period is important, as it allows the cleaning agents to continue working. Once cool, pour the water down the drain.
- The Reveal: You will be amazed to find that most, if not all, of the burnt residue has completely vanished. Give the pot a final, gentle scrub with a sponge under warm, soapy water to remove any last traces, rinse, and dry. Your pot will look brand new .
Part 8: Method 5 – The Aluminum Foil Ball (For Glass and Ceramic)
For glass baking dishes and ceramic stovetops, you need a scrubber that is abrasive enough to remove burnt-on gunk but soft enough not to scratch the surface. A crumpled ball of aluminum foil fits this description perfectly.
Best for: Glass baking dishes, Pyrex, CorningWare, and ceramic cooktops.
Ingredients:
- Aluminum foil
- Baking soda
- Dish soap
- Water
Step-by-Step Instructions:
- Create Your Scrubber: Tear off a sheet of aluminum foil and crumple it into a tight ball. The size should be comfortable to hold in your hand .
- Prepare the Cleaning Paste: In a small bowl, mix baking soda with a small amount of water and a drop of dish soap to form a thick, spreadable paste .
- Apply the Paste: Apply the paste liberally to the burnt areas of your glass dish or ceramic cooktop.
- Scrub with the Foil: Dip your aluminum foil ball into the paste and begin scrubbing the burnt area in gentle, circular motions. The foil will provide just enough abrasion to lift the burnt crust, while the baking soda paste does the chemical work. You will be surprised at how effectively this combination works without scratching .
- Rinse and Admire: Rinse the dish thoroughly with warm water to remove all paste and any tiny foil particles. Dry with a soft cloth. Your glassware will be sparkling clean.
Part 9: Special Care for Different Cookware Materials
Not all pots and pans are created equal. Using the wrong method on a delicate surface can cause irreversible damage. Here is a quick guide to material-specific care.
- Stainless Steel: This is the most forgiving material. It can handle boiling, baking soda, vinegar, salt scrubs, and even the dishwasher tablet method. Just avoid using harsh steel wool, which can leave unsightly scratches. Always scrub in the direction of the grain if you want to maintain a pristine finish .
- Non-Stick Cookware: Non-stick coatings are delicate and can be scratched or damaged by high heat and abrasive cleaners. Avoid the salt scrub and the aluminum foil ball. Stick to the gentlest methods: a long soak in hot, soapy water, followed by a gentle scrub with a soft sponge and a paste of baking soda. The baking soda simmer method can also work, but keep the heat low .
- Cast Iron (Unseasoned): Unseasoned cast iron (like the inside of a Dutch oven) can rust easily. For burnt-on food, the salt scrub method is excellent. The salt acts as an abrasive without damaging the surface. Rinse quickly and dry the pan immediately and thoroughly over low heat on the stove to prevent rust .
- Cast Iron (Seasoned): The seasoned surface of a cast iron skillet is what makes it non-stick. Harsh scrubbing or boiling water can strip this seasoning. For stuck-on food in a seasoned skillet, try the salt scrub first. If that doesn’t work, simmer a little water in the pan for a few minutes to loosen the food, then scrape gently with a spatula. After cleaning, you will likely need to re-season the pan by rubbing it with a thin layer of oil and heating it .
- Enameled Cast Iron: This beautiful cookware has a glass-like enamel coating that can chip and scratch. Avoid thermal shock (don’t put a hot pot in cold water), metal utensils, and harsh abrasives like salt scrubs or steel wool. The baking soda simmer method is your best friend here .
- Copper: Copper is soft and can be scratched easily. It also reacts with acids, which can be a concern if the tin lining is worn. For burnt-on food in copper, stick to a long soak in hot, soapy water and a very gentle scrub with a soft sponge and baking soda paste .
- Aluminum: Aluminum can react with acidic foods and with alkaline cleaners like baking soda, potentially causing discoloration (darkening). While baking soda is generally safe for cleaning, prolonged contact can sometimes cause a dull, gray film. The dishwasher tablet method is not recommended for aluminum, as the detergents can cause pitting and discoloration. A simple soak and gentle scrub with mild dish soap is often best .
Part 10: The Maintenance Mindset – Preventing Future Burns
An ounce of prevention is worth a pound of cure. By adopting a few simple habits, you can drastically reduce the frequency and severity of burnt-on messes.
- Mind Your Heat: Most burning happens because the heat is too high. Learn your stove and your cookware. Often, a medium or medium-low heat is sufficient for cooking and much less likely to cause burning.
- Don’t Walk Away: This is the hardest lesson. If you are doing something that requires high heat or has a high risk of burning, such as searing meat or reducing a sauce, stay in the kitchen.
- Use Enough Liquid: When simmering sauces or cooking rice, ensure you have enough liquid in the pan to prevent the food from drying out and sticking to the bottom.
- Stir Regularly: Frequent stirring distributes heat and prevents food from settling and burning on the bottom.
- Clean Up Promptly: While you should never pour cold water into a hot pan, you should also never let a dirty pan sit for days. As soon as the pan is cool enough to handle, give it a quick wash. Fresh spills are always easier to clean than dried-on, aged crusts .
Conclusion
The sight of a blackened, burnt pot no longer needs to be a source of dread. Armed with the knowledge in this guide, you can approach the task with confidence, knowing that you have a toolkit of safe, effective, and chemical-free methods at your disposal. From the gentle power of a baking soda simmer to the surprising effectiveness of a dishwasher tablet, nature and your pantry have provided everything you need to restore your cookware.
Each burnt pot is a lesson learned, a small culinary mishap that, with the right approach, can be rectified without resorting to harsh, toxic chemicals. You are not just cleaning a pan; you are practicing a form of kitchen alchemy, transforming a disaster into a triumph of gentle, effective cleaning. Your hands, your family, and the environment will all be better for it. So, the next time you hear that dreaded sizzle and smell that acrid smoke, take a deep breath, remember these methods, and know that your beloved cookware can be saved.
5 thoughts on “How to Clean Burnt Utensils Without Chemicals”